In this article, we are going to show you some of the methods by which you can fix 0x00000124 error in Windows 10 using some steps and methods.
Fix 0x00000124 Error in Windows 10
By Taking Some Protective Measures
You see the 0x00000124 error can be because of overheating of your desktop/laptop or it may be because of some loose part or because of some dirt that might be accumulated inside your PC hardware. So if you have a desktop system, take out all the removable components like RAM, processor, and other stuff and clean them with a dry brush, and put them back on again. Blow the dust out of your motherboard using a blower on cold settings. Place your desktop in a cool environment and if you use a laptop, use a cooling pad with it. Also if you have overclocked your CPU, try using it on regular settings and that should fix the error for you.
By Updating Device Drivers
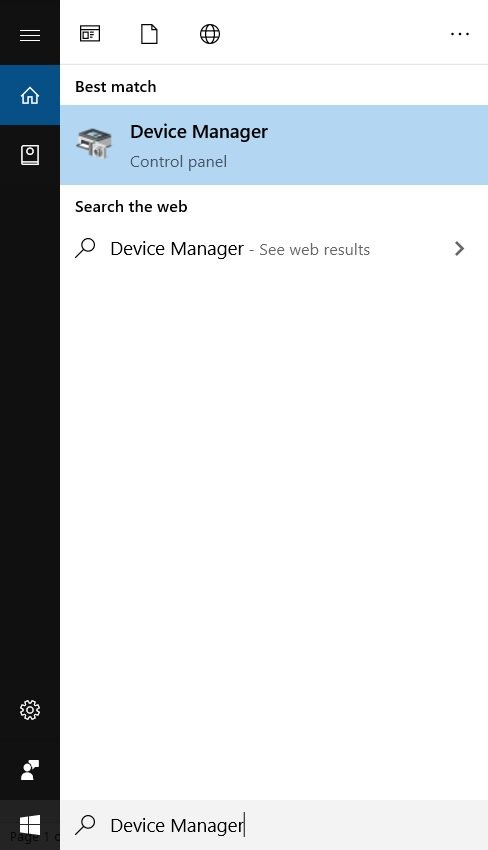
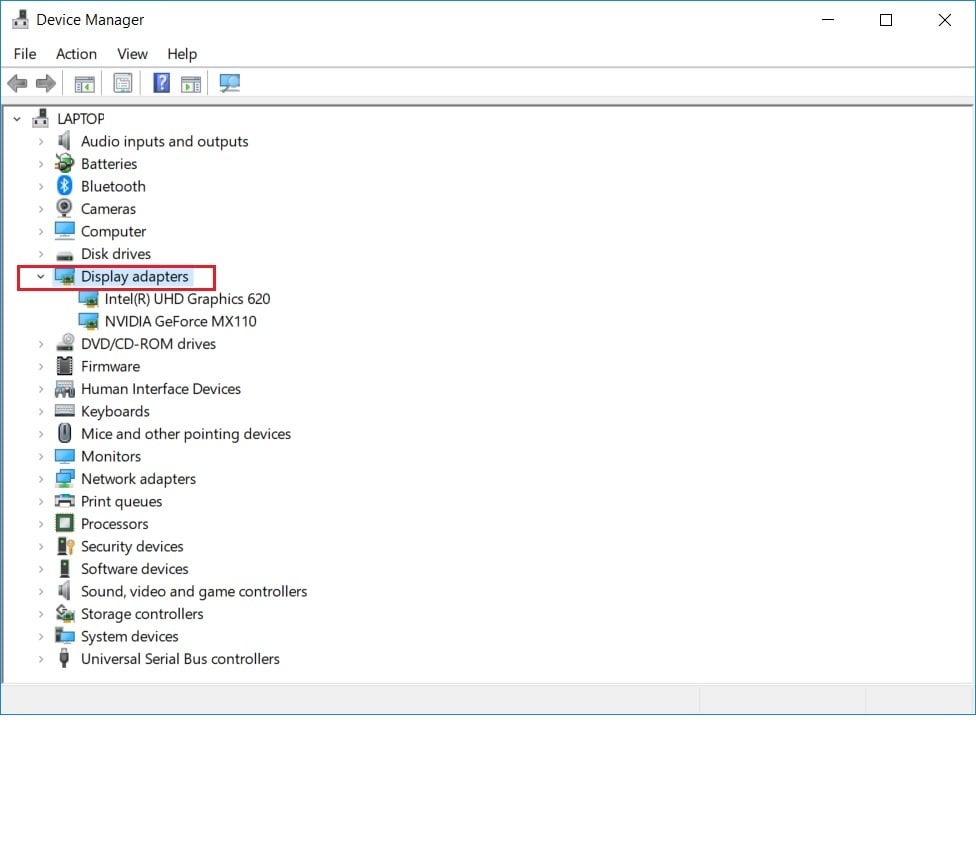
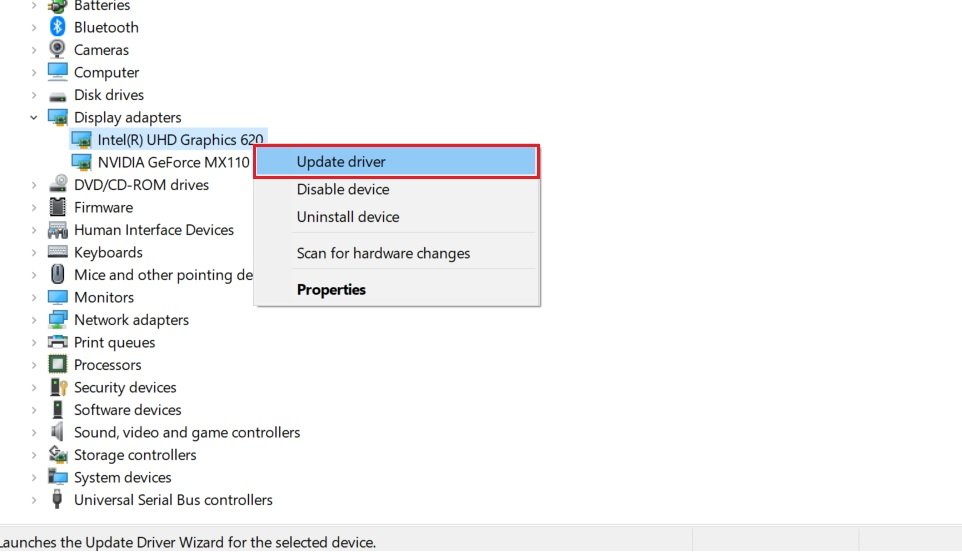
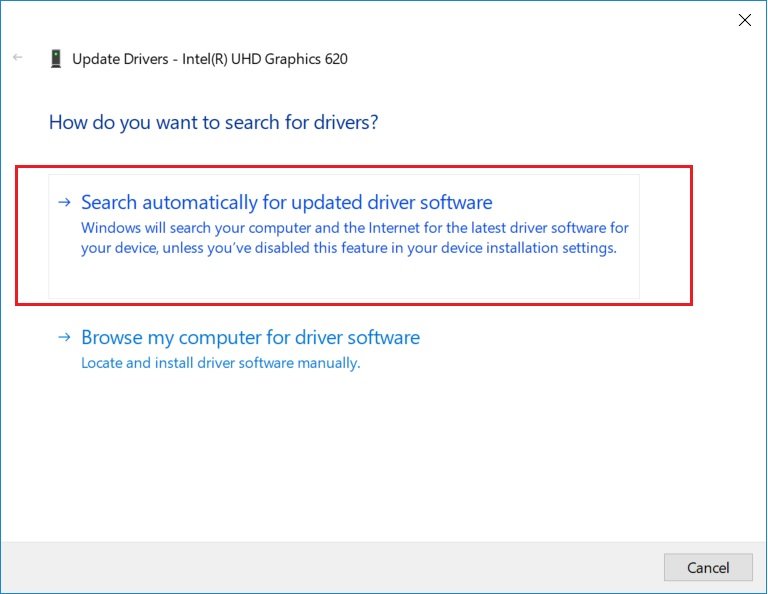
You see that error 0x00000124 is a hardware error and it has a lot to do with the faulty drivers. So to fix 0x00000124 error, you must update your divers. To do that on your own follow the steps given below: Step 1: Go to the Windows search bar and type, “Device Manager”. Step 2: Now, click on ‘Display adapters’, and you will find the list of drivers. Step 3: Right-click on the first driver, and select ‘Update driver’. Step 4: Now you will see the Update drivers wizard, select ‘Search automatically for updated driver software’. Step 5: Windows will search, download, and update the driver automatically. That’s it, just let the process complete and update all the drivers in a similar manner. Now if you do not want to go through this hectic process of updating drivers manually, which can be very time consuming, you can use DriverFix software for this purpose. It will automatically search for outdated drivers and show you the list of drivers that need updating. You can download DriverFix from the link below.
By Running Blue Screen Troubleshooter
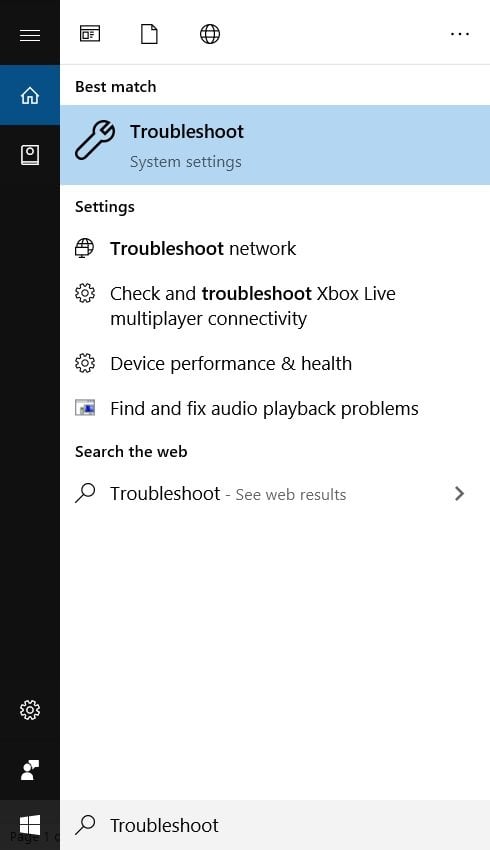
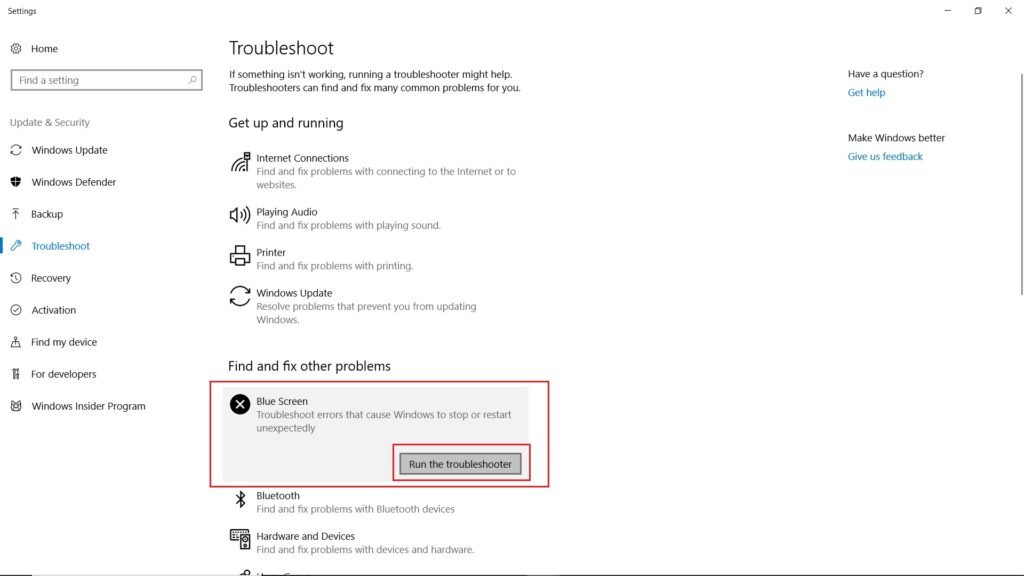
To fix 0x00000124 error, you can take help of the Windows Troubleshooter. Follow the steps given below to use the Blue Screen trouble shooter. Step 1: Go to the Windows search bar and type “Troubleshoot”. Step 2: Now you will see a list of troubleshooters, select ‘Blue Screen’ troubleshooter, and click on ‘Run the troubleshooter’. Step 3: Now go through the process, and the Windows troubleshooter shall fix the problem for you.
By Keeping Windows Updated
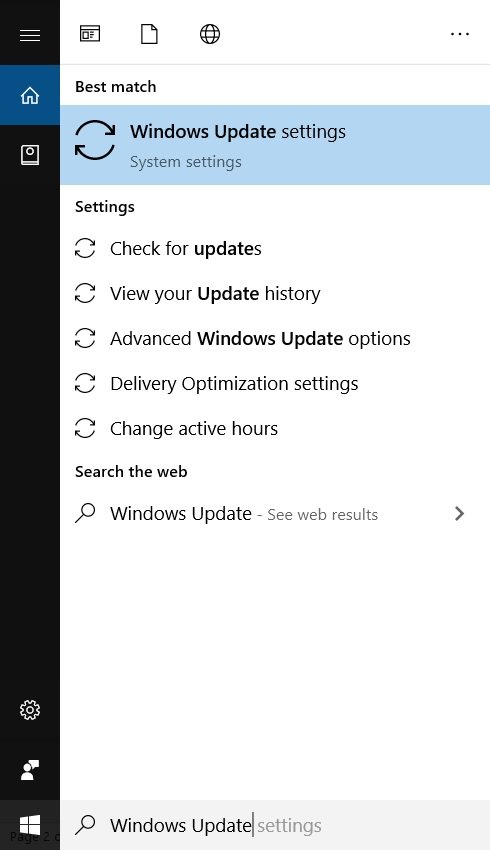
New Windows update also updates the drivers so it is very important that you keep your system updated. Windows 10 automatically installs the Windows updates and you can check them by yourself too. Step 1: Go to the Windows search bar and type “Windows updates”. Step 2: Now under ‘Update status’ you will see the option ‘Check for updates’, click on it. You will find the list of updates available, select the update and click on ‘Install now’. This shall fix the issue for you.
By Using the sfc Command
Step 1: Go to the Windows search bar and type “cmd”, right-click on it to ‘Run as administrator’. Step 2: Now enter the following command, “sfc /scannow”, and hit enter. Let the scan complete, upon completion, restart your system.
By Removing Any Newly Installed Hardware
If you have installed a new hardware component such as a graphic card, or something else, you would want to make sure that you have installed all the required software and updates for the hardware as per the hardware component’s manual. The hardware components have a certain system requirement and if that requirement isn’t matched by your device, you will likely get this error. So just try removing the new hardware component, see your system configuration, and then select a component to add.
By Disabling the C1E Enhanced Halt State
To disable the C1E Enhanced Halt State, you will have to open BIOS, follow the steps below: Step 1: Restart the Windows and press F2 key as the system reboots to open BIOS. Step 2: Using the keyboard keys(functionality of the keys will be indicated on the screen), go to ‘Advanced Chipset Features’ and then ‘CPU Configurations’. Step 3: Select the ‘C1E Enhanced Halt State’, and hit enter. Step 4: Now select the ‘Disable’ option, and press F10 key to save the changes. Exit the BIOS and restart your system. So these were some of the steps and methods by which you can fix the 0x00000124 error in Windows 10. Do try the methods and let us know if you face any errors. Are you facing any other problems and issues with Windows 10? Then there is nothing to worry about, we have an article dedicated to Windows 10’s issues and guides, visit Windows 10 Troubleshooting Guide, moreover, you can search the error in your site’s search bar, you will get the desired solution. I hope you would like this content if you have some more suggestions let us know in the comment section.
