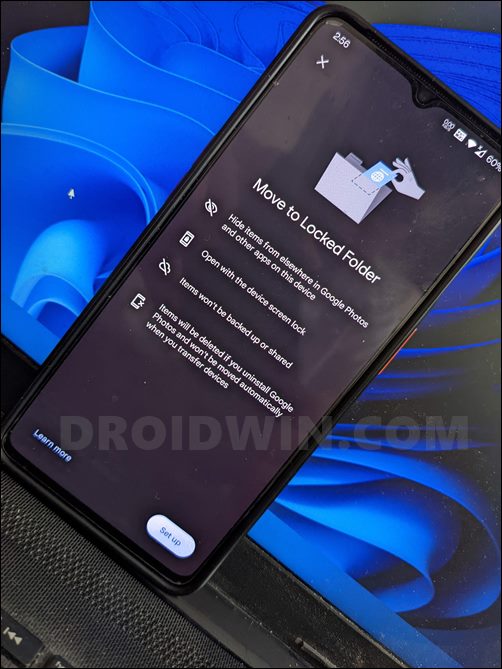
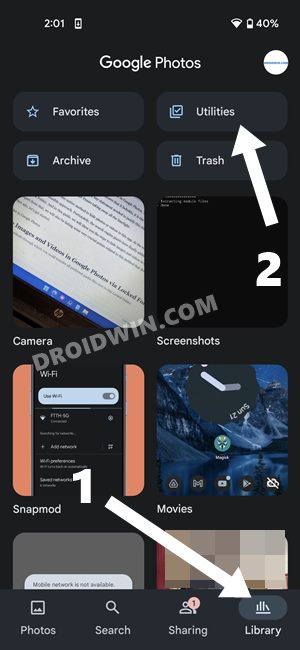
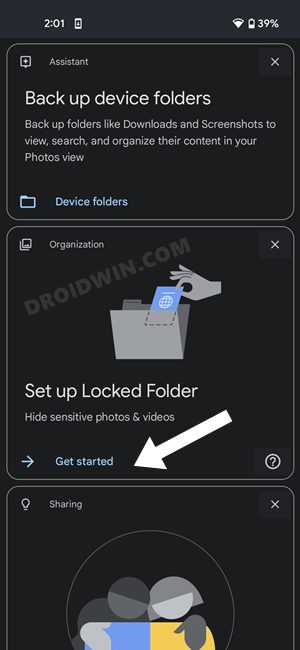
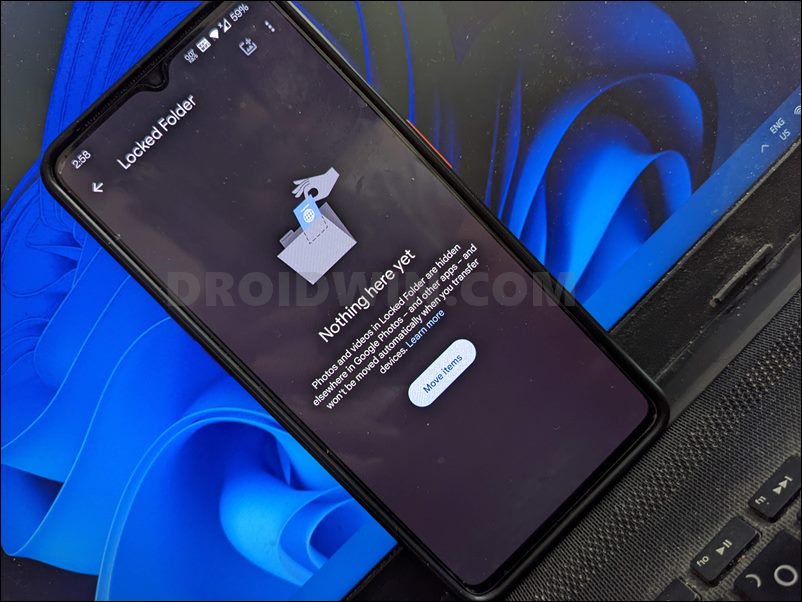
However, up until this point, there wasn’t any native method to hide photos or videos in this app. At the very most, you could archive those media files, but that wasn’t a feasible approach. Fortunately, the search engine giants have finally addressed this concern, with the introduction of the new Lock Folder. And in this guide, we will show you the steps to hide images and videos in Google Photos using this Lock Folder feature. Apart from that, we will also be listing some very crucial points related to this method that deserves your attention. So without any further ado, let’s get started.
What is Locked Folder in Google Photos?
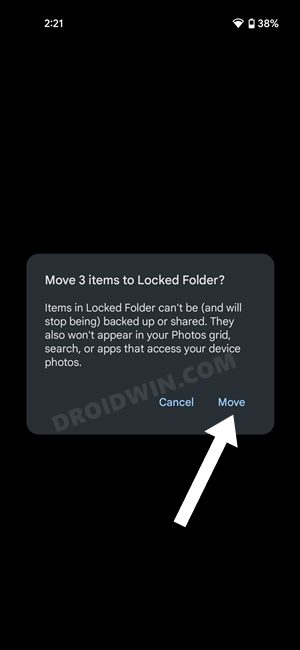
The Locked Folder in Google Photos allows you to save/hide all your sensitive photos and videos behind a lock-screen. Only the user who has access to your device’s PIN, Password, or Fingerprint would be able to access these files. Moreover, all these files will be hidden from the Photos Grid, Memories, Search Results, and Albums. Along the same lines, other third-party apps that have access to your photos and videos wouldn’t be able to view or use these photos and videos.
Another important point to keep in mind is that these devices aren’t stored over to the clouds, but are only stored locally on your device. So if you sign in to another device or your PC via the same Google account, then those photos and videos wouldn’t be available there. So we will then have to manually transfer those media files via USB cable? Well, you wouldn’t be able to even do that! There is no way for any app, service, program, or device to have access to the contents of the Locked Folder. If you want that to happen, then you will first have to move that image or video out of that Locked Folder (which is explained later on in this guide). Apart from that, you wouldn’t be able to take screenshots or perform a screen record inside this folder. All in all, this new Google Photos feature offers a highly secure, restrictive, and private storage environment.
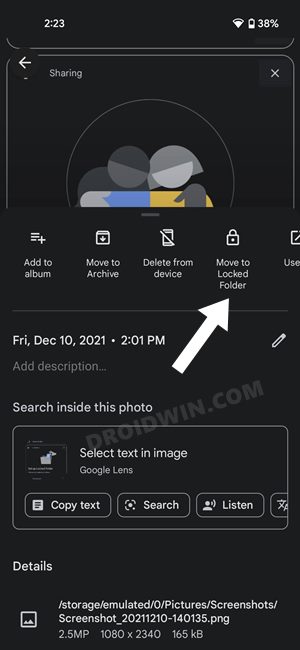
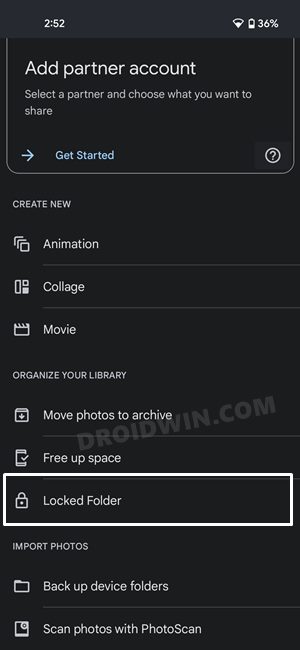
How to Hide Images and Videos in Google Photos via Locked Folder
That’s it. These were the steps to hide images and videos in Google Photos using the Locked Folder feature. Let’s now show you the steps to unhide these files, i.e, moving them out of this folder.
How to Unhide Files in Google Photos | Move out of Locked Folder
As mentioned before, none of the third-party apps or even any other device signed in with the same Google account would be able to access the files stored inside this directory. So if you want that to happen, you will first have to move that file out of the Locked Folder, or in other words, unhide it. Here’s how it could be done:
Google Photos Locked Folder: Think Twice Before Deleting Files!
While we have already stated this fact before but we would like to re-iterate it once more- all the files and folders inside the Locked Folder aren’t synced to the clouds. They are only saved locally on your device. So if you delete an image or video from the Local Folder, then they are gone for good, in other words, permanently deleted. To avoid that from happening, you should consider moving that file out of the Locked Folder and then deleting it. This way it would be removed from your device but would still be present on the clouds, thereby letting you access and download it as and when required. But if you really don’t want to have any trace of that file, locally or online, then you may directly delete it from the Locked Folder itself. On that note, we round off this guide on how you could hide images and videos in Google Photos. Likewise, we have also listed the steps to revert this tweak- that is unhide and subsequently remove them from that folder. What are your views on the Locked Folder feature of Google Photos? Do let us know in the comments section below.
About Chief Editor
